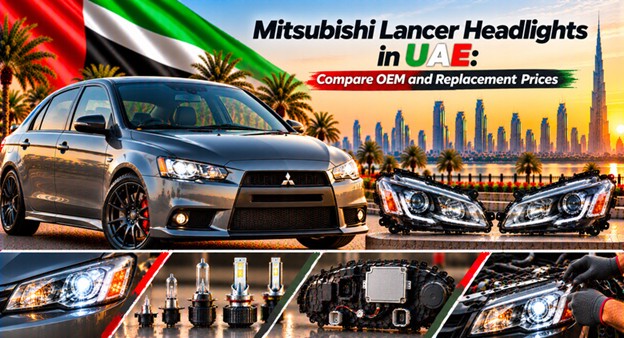
Mitsubishi Lancer Headlights in UAE: Compare OEM and Replacement Prices
October 27, 2026
A Lancer Headlight Can Cost More Than the Fault Suggests
The Mitsubishi Lancer has spent years earning its place on UAE roads. It is familiar in Dubai car parks, still turns up on Sharjah residential streets, and remains a practical choice for drivers who would rather keep a dependable saloon running than stretch their budget for another car.
Then a headlight starts to fail.
Perhaps the lens has gone cloudy after years in the sun. Maybe a stone has cracked the housing on the motorway, or the low beam has stopped working just when the evening commute gets busy. The temptation is to search for the cheapest replacement, compare two photographs and order the one that looks right.
Hold on.
Mitsubishi Lancer headlights in UAE vary by generation, facelift, trim and lighting specification. A lamp for an older halogen-equipped car may be much simpler than an assembly with HID equipment or other integrated electrical parts. Even where the outer shape looks similar, the connectors, mounting points and beam pattern can differ.
The price comparison only makes sense once the correct part has been identified. Otherwise, you are comparing prices for things that may not fit the same car.
Which Mitsubishi Lancer Generation Do You Own?
The Lancer name covers several generations and numerous market variations. In the UAE used-car market, older models remain particularly relevant because owners often keep them for years, repair them as needed and look for replacement parts that make financial sense.
The first job is to identify the exact vehicle. Registration year alone may not settle it, especially if the car was imported or registered some time after production.
Check these details before asking for a quotation:
- Model year and generation.
- Production date and facelift version.
- Trim level and original lighting system.
- Left or right headlight, as viewed from the driver's seat.
- Existing part number, if the label is readable.
- VIN and original market specification.
A supplier might advertise a headlight for a broad range of Lancer model years, but that description is only a starting point. The correct part number and vehicle specification should decide the purchase.
If the car has already had a front-end repair, inspect the existing lamp carefully. It may not be the original unit, which means copying its part number without verification could repeat an earlier fitment mistake.
OEM, Genuine and Aftermarket: What Are You Actually Buying?
These labels often get blurred together in spare-parts listings. They should not be.
A genuine Mitsubishi headlight is sold as an original Mitsubishi replacement part. An OEM label refers to original equipment manufacturing, but a seller's use of the term does not, by itself, prove that the lamp is genuine or identical to the factory-fitted assembly. An aftermarket headlight is made for the replacement market, with quality depending on the manufacturer and product.
| Replacement type | Main attraction | What deserves scrutiny |
|---|---|---|
| New genuine Mitsubishi | Original specification when correctly matched | Purchase price and local availability |
| Used genuine Mitsubishi | Potentially lower cost while retaining original design | Age, lens condition, moisture and electrical wear |
| New aftermarket | Can reduce the initial outlay | Optical quality, fit and warranty |
| Reconditioned assembly | May reuse an original housing at a lower cost | Quality of repairs and testing |
| Repair of existing lamp | Avoids replacing a complete assembly when the fault is minor | Whether the damaged area can be repaired safely |
There is no automatic winner. For a well-kept Lancer that will remain in the family for several years, a new genuine assembly may be worth considering. For an older commuter with a tight repair budget, a tested used original or reputable aftermarket unit may be the more sensible choice.
The important question is not which label sounds best. It is what you receive, how well it works and what happens if it fails.
Mitsubishi Lancer Headlight Prices in the UAE
The cost can vary sharply according to lighting technology, model year and whether you buy a complete assembly or only a replaceable part. A basic halogen headlight and a more involved HID assembly should not be expected to carry the same price.
A useful quotation needs to distinguish the headlight itself from labour, delivery, electrical diagnosis and alignment. Otherwise, an attractive advertised price may turn into a much less attractive invoice.
For a budget estimate, use the table below as a guide to the price factors, not as a claim that a particular part is currently available at a specific UAE price.
| Price factor | Why it changes the bill |
|---|---|
| New genuine assembly | Original replacement part, often at a higher purchase price |
| Used genuine assembly | Condition, source and warranty affect value |
| Aftermarket assembly | Manufacturer, specification and construction influence cost |
| HID or specialist lighting | Additional equipment can increase parts and diagnostic costs |
| Fitting labour | Access, bumper removal and broken fasteners affect time |
| Electrical work | Wiring, connectors or control equipment may need attention |
| Beam alignment | Needed to confirm the lamps are aimed correctly |
| Delivery or import charges | Relevant when the part is not stocked locally |
Ask for a current quotation in AED for your exact Lancer, with the part number stated on the quote. If the supplier cannot verify fitment, the price is not yet a reliable offer.
Genuine Mitsubishi Headlights: What the Catalogue Prices Tell Us
Original parts can be surprisingly expensive, particularly when the assembly includes HID lighting. The difference is not merely a badge on the box; the specification, integrated equipment and supply chain all affect the price.
For a useful comparison, a US-based Mitsubishi parts catalogue lists selected 2008 Lancer halogen assemblies under references 8301B075 and 8301B076, with catalogue prices of approximately US$663 and US$815 respectively. The same catalogue lists selected HID assemblies, 8301C363 and 8301C364, at around US$1,177 each. These are overseas catalogue figures, not UAE retail prices, and the exact vehicle application must be confirmed before using any reference.
That is a substantial difference between lighting types. It also shows why a seller's quote needs context. Is it for a complete assembly? Does it include the control equipment? Is it a genuine part, or a replacement housing that requires parts from your old lamp?
Do not compare a bare housing with a complete headlight and call the cheaper one a bargain. They are different purchases.
Aftermarket Prices: A Useful Benchmark, Not a Promise
Aftermarket assemblies can be considerably cheaper than genuine Mitsubishi parts. As one overseas reference, a replacement-parts catalogue lists selected halogen headlamps for the 2009–2017 Lancer range at US$102.95 for the left side and US$97.95 for the right. The listing identifies the units as aftermarket and gives corresponding original references 8301C361 and 8301C362.
Those prices are useful for understanding the gap between genuine and aftermarket products, but they should not be converted into a claim about the price you will pay in Dubai or Sharjah. Freight, import charges, local stock, VAT and supplier margins can change the final figure. Nor does a broad year range prove that the lamp suits every trim or market.
For a UAE buyer, the practical comparison is the delivered, compatible part. Ask for the manufacturer's name, the precise reference, the warranty and a clear statement of what comes in the box. If the seller cannot answer those questions, the low price has not yet earned your confidence.
Why the Cheapest Headlight Can Become the Costliest
A headlight that arrives with the wrong connector is not a bargain. Neither is one with a broken mounting tab, a poor beam pattern or an internal fault that appears after installation.
Suppose a low-priced assembly costs less than a better-known replacement, but the workshop discovers that the rear cover is missing and the mounting bracket does not line up. You may need extra parts, more labour or a return shipment. If the seller refuses the return because the lamp has been fitted, the apparent saving can disappear rather quickly.
Look beyond the front lens. Check the rear housing, connectors, adjusters and mounting points. For a used unit, ask whether it has been tested and whether the seller offers a meaningful return period.
One more thing: a headlight can illuminate and still be unsuitable. Poorly formed optics may scatter light or leave dark patches on the road. You want a beam that works, not simply a bulb that switches on.
UAE Heat and Dust: What Happens to Older Lancer Headlights?
Park a Lancer outside through a long UAE summer and its exterior plastics take a steady beating. Sunlight can degrade the lens surface, while dust, repeated washing and temperature changes add to the wear. Age matters too, particularly on cars that have spent years parked outdoors.
The usual warning signs are easy to spot. The lens turns yellow or cloudy; the light becomes dull; a seam begins to leak; or condensation hangs around inside the housing long after the car has dried out.
Yet not every cloudy lamp needs replacing. External oxidation may respond to professional restoration, while a cracked housing or deteriorated internal reflector is a different problem. Diagnose it first.
If water is entering the lamp, find the route. It could be a damaged seal, a crack, a poorly fitted rear cover or a problem with the housing vent. Replacing the bulb will not solve any of those faults.
Is the Headlight Fault Actually a Failed Bulb?
Before buying a complete assembly, check the simple possibilities.
A failed bulb can leave one beam out while the rest of the headlight continues working. A damaged connector, corroded terminal, blown fuse or wiring fault can produce similar symptoms, and HID-equipped cars may have additional equipment that needs testing.
| Symptom | Possible cause | First sensible check |
|---|---|---|
| One beam has stopped working | Bulb, connector or wiring fault | Test the bulb and power supply |
| Both headlights fail | Fuse, switch, power supply or control fault | Diagnose the shared electrical circuit |
| Light flickers intermittently | Loose connection or failing electrical equipment | Inspect connectors and test the circuit |
| Beam is weak despite a working bulb | Cloudy lens, damaged reflector or incorrect bulb | Inspect the optics and verify the bulb type |
| Moisture keeps returning | Crack, seal, vent or cover problem | Inspect the housing for water entry |
| Lamp points in the wrong direction | Poor adjustment or damaged mounting | Check the assembly and align the beam |
The aim is to establish the fault before buying parts. A workshop that recommends replacing both complete headlights without testing the system should explain its reasoning.
Can You Restore a Cloudy Mitsubishi Lancer Headlight?
Yes, if the damage is mainly on the outer lens and the rest of the assembly remains sound.
Professional restoration can remove surface oxidation and improve clarity. The process should also restore suitable protection to the lens, because polishing away the damaged surface without protecting it can leave the lamp vulnerable to further UV deterioration.
There are limits. Restoration will not repair a cracked casing, damaged reflector, failed HID equipment or badly deteriorated internal surfaces. If the lamp keeps misting up or its beam remains weak after the lens is cleaned, replacement may be the better answer.
Ask the workshop to check beam output and the condition of the housing, not just whether the plastic looks clearer. A shiny lens is pleasing, certainly, but the purpose of the job is safe visibility after dark.
Used Genuine Headlights: What to Inspect Before Paying
A used original Mitsubishi headlight can be a good match for an older Lancer, particularly when a new genuine assembly costs a disproportionate amount compared with the car's value. But used parts need a closer look than new ones.
Ask for photographs of the actual unit, not a stock image. The front lens tells only part of the story; the rear casing, mounting tabs, electrical connectors and part-number label matter just as much.
Check for:
- Cracks, deep scratches or heavy lens oxidation.
- Broken mounting tabs or signs of glued repairs.
- Corrosion around the connectors and terminals.
- Burn marks, damaged reflectors or internal discolouration.
- Standing water or persistent moisture inside the housing.
- Missing rear covers, bulbs, adjusters or control equipment.
- A part number that matches your Lancer's exact specification.
If the lamp came from a vehicle involved in a front-end collision, be particularly careful. A headlight may look intact while its mounting points have been stressed or repaired. That can make proper alignment difficult.
Get the warranty or return terms in writing. “Tested before removal” is useful information, but it is not the same as a guarantee that the lamp will work correctly after installation.
Part Numbers and Fitment: Do Not Buy by Appearance Alone
For selected 2008 Lancer applications, catalogue references 8301B075 and 8301B076 identify halogen headlight assemblies for opposite sides of the vehicle. Other references apply to HID versions, and later production years may use different numbers or superseding parts.
These examples help illustrate the point, not establish a universal fitment list. A number that works for one market, trim or production date may not be right for another.
Before ordering, have the supplier confirm:
- The VIN and production date.
- The original headlight's part number, if available.
- The required side and lighting technology.
- Whether the replacement is a complete assembly or a housing only.
- Whether any existing control modules, bulbs or covers must be transferred.
If your Lancer has been imported, the original market specification deserves extra attention. A seller's broad “fits Lancer 2008–2015” description should never replace a proper compatibility check.
Halogen or HID? The Difference Matters to Your Budget
Halogen systems are generally simpler to work with, although the exact design still depends on the vehicle. HID systems use additional electrical equipment, and replacing a complete assembly can cost more than changing a bulb or repairing a straightforward connection.
The overseas Mitsubishi catalogue illustrates the price gap. Selected 2008 Lancer halogen assemblies are listed at lower catalogue prices than the corresponding HID units, which are shown at about US$1,177 each. These are US prices and must not be mistaken for UAE retail quotations.
If your Lancer originally came with HID lighting, do not assume a halogen assembly is a straightforward substitute. The wiring, control equipment, mounting and beam characteristics may differ.
Nor should you convert the system just because a different lamp looks more modern. The optics need to work with the light source, and the resulting beam must be suitable for road use. A cheaper conversion is no saving if it creates glare, warning lights or a poor view of the road.
What Should You Budget for Fitting and Alignment?
The headlight itself is only one part of the bill. Depending on the Lancer's configuration and the condition of its fasteners, the workshop may need to remove trim or loosen the bumper to gain access. If the car has damaged wiring or corroded connectors, diagnostic work can add to the labour.
The figures below are illustrative budgeting allowances, not verified UAE workshop tariffs. Use them to structure a quotation, then confirm the actual charges locally.
| Job item | Illustrative allowance in AED | What to ask |
|---|---|---|
| Initial diagnosis | 150–350 | Is electrical testing included? |
| Straightforward fitting | 200–500 | Does the price include bumper or trim removal? |
| Additional electrical work | 200–500+ | What fault has been found, and which parts are needed? |
| Beam alignment | 100–250 | Will both headlights be checked? |
| Bulbs, covers or small fittings | Variable | Are these included with the assembly? |
| Specialist calibration or programming, if required | Quote needed | Does this exact vehicle need it? |
Not every job needs every service listed here. A basic halogen replacement may be relatively straightforward, while an HID fault or damaged wiring can take longer to diagnose.
Ask for a written, itemised quotation that separates parts from labour. Confirm whether VAT and delivery are included, too. The total installed price is the number that matters.
Worked Cost Comparison: Used Original Versus New Aftermarket
Consider a Lancer owner in Ajman who discovers that the headlight housing has cracked. The lamp still comes on, but rainwater has started collecting inside it. The workshop recommends replacing the assembly.
For illustration, suppose a used original unit costs AED 400 and a new aftermarket assembly costs AED 600. Assume fitting and alignment cost AED 350 for either option.
| Option | Part cost | Fitting and alignment | Illustrative total |
|---|---|---|---|
| Used original assembly | AED 400 | AED 350 | AED 750 |
| New aftermarket assembly | AED 600 | AED 350 | AED 950 |
These are hypothetical figures, not current UAE offers. They also assume both assemblies fit correctly and need no additional parts.
The used lamp saves AED 200 at the outset. But what if it has a questionable seal, no return protection and a history the seller cannot explain? A new aftermarket unit from a reputable manufacturer, with a clear warranty, may be worth the extra outlay.
Reverse the circumstances and the decision changes. A tested original lamp in excellent condition, supplied with a sensible return period, may be a stronger purchase than an unfamiliar aftermarket unit.
Compare condition, warranty and compatibility alongside price. That is how you avoid paying twice.
Repair or Replace the Existing Headlight?
A failed bulb does not usually justify replacing a complete assembly. Neither does every loose connector or minor external lens blemish.
Repair may make sense when the fault is limited to a replaceable bulb, a repairable connection or surface oxidation. Replacement becomes more attractive when the housing is cracked, moisture repeatedly enters the lamp, the internal reflector has deteriorated or the assembly can no longer produce a suitable beam.
There is also the cost of repeated repairs. If a workshop keeps drying out a leaking headlight or replacing bulbs without addressing the underlying electrical fault, the invoices can pile up while the problem remains.
Ask the technician to show you what has failed. If a complete assembly is recommended, find out why the damaged part cannot be repaired safely. A proper diagnosis should lead to a clear explanation, not a vague instruction to replace everything.
What a Proper Headlight Installation Should Include
A new headlight should fit securely, connect correctly and produce the intended beam. That sounds obvious, yet rushed installations can leave owners with rattling housings, uneven gaps or lights that point in the wrong direction.
A competent workshop should confirm the replacement part before dismantling the front end, protect the surrounding paintwork and remove the necessary trim without snapping aged plastic clips. The technician should avoid forcing the lamp into place if a bracket or connector does not line up.
Once fitted, the workshop should check the low and high beams, indicators and any other lighting functions on the vehicle. It should also inspect the connectors, secure the rear covers, check for dashboard warnings where applicable and align the beams correctly.
If the old lamp failed because of water ingress, the source of the leak should be addressed. Installing a replacement without correcting the cause could leave you with the same problem a few weeks later.
Before collecting the car, ask to see the lights working. It takes little time, and it gives you a chance to spot a flicker, warning or obvious alignment problem while the workshop is still there to deal with it.
How Long Will a Lancer Headlight Replacement Take?
A straightforward replacement may take around one to two hours, but treat that as a planning estimate rather than a guaranteed turnaround. The design of the front end, the condition of the fasteners and the lighting system can all affect the time required.
If the technician finds a damaged connector or an electrical fault, diagnosis may take longer than the physical replacement. An imported assembly can add further delay if the supplier needs to confirm the part number or wait for delivery.
Before booking, ask two things: is the exact part in stock, and has fitment been verified? Those questions can prevent an unnecessary trip to the workshop, particularly if you rely on the Lancer for a daily commute between Sharjah and Dubai or across Abu Dhabi.
Do not keep driving at night with a badly impaired headlight just because the replacement has not arrived. Arrange suitable transport or get the fault assessed promptly if visibility is compromised.
Can You Replace a Mitsubishi Lancer Headlight Yourself?
A confident home mechanic with the right tools and vehicle-specific instructions may be able to replace a straightforward assembly. For someone without experience, however, the job can be more fiddly than it appears.
Access may require trim or bumper removal, and old plastic clips can break with surprisingly little force. On HID-equipped vehicles, the electrical system also needs to be handled according to the correct safety procedure.
If you do the work yourself, verify the replacement part before dismantling the car, follow the repair instructions and avoid forcing connectors or mounting tabs. Never work on damaged or energised high-voltage lighting equipment without the appropriate knowledge and precautions.
And do not skip alignment. Getting the lamp to switch on is only the first test; it must also illuminate the road correctly without dazzling other drivers.
For many owners, paying a workshop to fit and align the assembly is money well spent, particularly when the vehicle uses a more involved lighting system.
Looking After Headlights Through a UAE Summer
Strong sunlight, heat, dust and repeated washing can take their toll on ageing headlight lenses. A few sensible habits can help preserve the replacement, although no cleaning routine will prevent every form of wear.
Use a suitable automotive cleaner and a soft cloth. Avoid harsh household chemicals or abrasive pads that can scratch the lens or damage its protective surface. If you have had the headlights professionally restored, ask whether a UV-resistant finish was applied.
Inspect the housings after washing the car or driving through heavy rain. Persistent condensation, droplets or standing water deserve attention. Also check that rear covers have been secured properly after bulb replacement, as a missing cover can let dust and moisture reach the interior.
If you notice a change in beam strength, do not assume the bulb is dying. Lens deterioration, reflector damage, electrical faults and poor alignment can produce similar symptoms.
A quick check now can save an avoidable replacement later.
How to Check Aftermarket Headlight Quality
Two replacement lamps can look almost identical in a product photograph and perform quite differently once they are fitted. The difference may sit in the lens moulding, reflector design, mounting accuracy or quality of the materials, none of which a glossy front-on image tells you much about.
Ask the supplier for the manufacturer's name and exact product reference. Check whether the lamp is designed for your Lancer's lighting system, and request photographs of the rear casing, connectors and mounting points. If it is advertised as an equivalent to a genuine part, ask which original reference it replaces.
Look for a clear warranty and a realistic returns policy. A seller who can explain the product's limitations is more useful than one who promises that every Lancer headlight is interchangeable.
If the price seems unusually low, find out what has been left out. It could be a bare housing, an assembly without bulbs or control equipment, or a product intended for a different specification. The explanation may be perfectly reasonable, but you need it before paying.
Warranty and Returns: Get the Terms Before Installation
Headlights are awkward parts to return once they have been fitted. A supplier may reject a claim if the housing has been scratched during installation, a connector has been damaged or the product has been modified. Some sellers also impose specific conditions on electrical parts.
Before buying, establish the warranty period, what faults are covered and whether professional installation is required. Ask how the seller handles a lamp that arrives damaged or proves incompatible despite the information supplied.
For imported parts, confirm the delivery date and whether shipping, customs charges and any applicable taxes are included. A low overseas price may look attractive until the full landed cost is known.
Keep the invoice, product reference and photographs of the item as delivered. If a problem develops, these records make it easier to establish what you bought and when.
One simple rule helps: do not accept “warranty available” as a complete answer. Ask for the actual terms.
Will a Replacement Headlight Improve Resale Value?
A correctly fitted headlight can improve the appearance of an older Lancer and help reassure a prospective buyer that basic maintenance has not been neglected. Cloudy lenses, mismatched lamps and visible water damage can have the opposite effect.
But spending more does not automatically increase resale value by the same amount. An expensive genuine assembly fitted to an older, high-mileage car may be difficult to recover when you sell it. A suitable aftermarket replacement may deliver the same practical improvement at a lower cost.
Keep the invoice and record the part fitted. If the headlight was damaged in a collision, make sure the surrounding bodywork has also been inspected and repaired properly.
The sensible goal is a safe, tidy and reliable repair. Unless originality is particularly important to your intended buyer, paying a premium solely for a genuine badge may not be the best use of the budget.
Should You Upgrade Your Lancer to LED Lighting?
LED lighting can be appealing, particularly if the existing lamps are old and the owner wants a fresher appearance. But fitting an LED bulb into a headlight designed for halogen lighting does not automatically improve visibility.
The reflector or projector optics are designed around a particular light source. An unsuitable conversion can scatter light, produce glare or leave dark areas where the driver needs illumination. Depending on the vehicle and kit, electrical compatibility can also cause problems.
Before considering an upgrade, check the original lighting specification, the replacement's compatibility, local road-use requirements and the warranty. A complete assembly designed for the vehicle may be a different proposition from a generic conversion bulb.
If your existing headlight is damaged, a correctly matched replacement is often the simpler route. Better lighting should mean a more useful beam, not merely a whiter glow.
Common Mistakes When Buying Mitsubishi Lancer Headlights
The same errors crop up again and again, especially when buyers are in a hurry to get an older car back on the road.
- Ordering by model year without checking the generation and lighting system.
- Buying the wrong side of the vehicle.
- Treating an OEM label as proof of a genuine Mitsubishi part.
- Comparing a complete assembly with a bare housing.
- Forgetting to check whether bulbs, covers or control equipment are included.
- Buying a used lamp without inspecting the mounting points and rear casing.
- Assuming a headlight that physically fits will produce the correct beam.
- Replacing the entire assembly before checking the bulb, fuse or wiring.
- Accepting unclear warranty conditions.
- Comparing overseas catalogue prices directly with UAE retail quotations.
The underlying problem is simple: the purchase is being made before the specification is established. Reverse that order. Confirm the part first, then compare the options.
Mitsubishi Lancer Headlight Buying Checklist
Before placing an order, work through these checks. They apply whether you are buying from a local parts supplier, a dismantler or an overseas seller.
Before you buy
0 of 10 checked
Confirm the Lancer's model year, generation and production date.
Provide the VIN or verify the original headlight part number.
Check the required side and lighting technology.
Confirm the lamp is suitable for the vehicle's market specification.
Establish whether the quote covers a complete assembly or housing only.
Check whether bulbs, covers and control equipment are included.
Inspect used parts for cracks, moisture, corrosion and broken mounts.
Ask for the complete UAE price, including delivery and applicable charges.
Get the warranty and return conditions in writing.
Confirm fitting, function testing and beam alignment.
If the supplier cannot confirm fitment, hold off. A little checking before payment is far less troublesome than arranging a return after the bumper has been removed.
Questions to Ask Before Approving the Workshop Quote
A useful quotation should explain both the proposed repair and the cost. Ask the technician whether the fault lies in the bulb, wiring, lens, housing or internal electronics. If a complete assembly is needed, ask why the existing unit cannot be repaired safely.
Then pin down the details. Is the replacement genuine, used or aftermarket? What is the part number? Does the price include fitting, alignment and any required electrical work? Are replacement clips or covers extra?
Ask to see the old part once it has been removed. If the housing is cracked or the connector is corroded, seeing the damage helps you understand the repair rather than simply accepting a recommendation.
Before collecting the car, check that both headlights operate correctly, the dashboard shows no new lighting warnings and the beam alignment has been tested. If a warranty applies to the replacement, keep the invoice and confirm how to make a claim.
A good workshop should be able to answer these questions without making the conversation difficult.
Finding a Suitable Mitsubishi Lancer Headlight in the UAE
Start with the vehicle specification, then compare the available parts. That sounds less exciting than hunting for the lowest price, but it is how you avoid buying an assembly that does not fit or discovering that the quoted price excludes essential equipment.
At PartFinder UAE, the sensible approach is to compare genuine, used original and aftermarket options only after confirming the part number, side and lighting system. Ask the supplier to verify compatibility using your VIN wherever possible, particularly if the Lancer has been imported or its front end has been repaired before.
For used stock, inspect the actual lamp and clarify the return period. For aftermarket stock, identify the manufacturer and confirm what the assembly includes. For genuine parts, check the exact reference and whether the quoted price reflects local stock or an overseas order.
Then compare the complete cost, not just the figure in the listing. Delivery, fitting, electrical diagnosis and beam alignment may all affect what you eventually pay.
UAE Price Reference Update: 14 October 2026
The most useful price evidence available for this comparison includes overseas catalogue listings. These help show the difference between lighting specifications, but they do not establish current UAE retail prices or local stock availability.
For selected 2008 Mitsubishi Lancer applications, an overseas parts catalogue lists halogen assemblies under references 8301B075 and 8301B076 at approximately US$663 and US$815 respectively. Selected HID assemblies, references 8301C363 and 8301C364, are listed at approximately US$1,177 each. The application and side must be verified against the actual vehicle before ordering.
A separate replacement-parts listing gives US prices of US$102.95 for a selected aftermarket left-side halogen assembly and US$97.95 for the right-side version, with references 8301C361 and 8301C362. These are overseas listing prices, not UAE offers, and the broad model-year description does not replace VIN-based fitment confirmation.
| Price comparison | Evidence available | What a UAE buyer should do |
|---|---|---|
| Genuine halogen assembly | Overseas catalogue prices available for selected applications | Request a current local quote using the part number |
| Genuine HID assembly | Overseas catalogue prices indicate a higher-cost option | Confirm the lighting system and included equipment |
| Aftermarket assembly | Overseas listings show lower advertised prices for selected units | Check landed cost, manufacturer and warranty |
| Used original assembly | No verified, comparable UAE price established here | Inspect the actual lamp and obtain a written return policy |
| Fitting and alignment | No verified workshop tariff established here | Request an itemised quote from the chosen workshop |
The figures should not be converted directly into AED and presented as local retail prices. Exchange rates, freight, customs charges, VAT, availability and supplier pricing can all affect the final cost.
For an accurate purchase decision, ask for a VIN-matched quotation in AED and confirm whether the amount includes delivery, VAT where applicable, fitting and beam alignment.
Frequently Asked Questions
Categories
- Audi
- BMW
- Car Accessories
- Car Tips
- Ford
- Land Rover
- Mazda
- Range Rover
- Top 10
- UAE Car Parts
- Used Car Parts
- Toyota
- Replacement Engines
- Nissan
- Hyundai
- Mitsubishi
- Volkswagen
- Honda
- Kia
- Chevrolet
- Dodge
- Jeep
- Subaru
- Renault
- Lexus
- Mercedes
- Suzuki
- Hummer
- Porsche
- Infiniti
- Peugeot
- GMC
- Mini
- Volvo
- Replacement Gearboxes
- MG
- Jaguar
- Skoda
- Cadillac
- Daihatsu
- Fiat
- German Car Parts
- Japanese Car Parts
- Aftermarket Car Parts
- Genuine Car Parts
- New Car Parts
- Reconditioned Car Parts
- European Car Parts
- American Car Parts
- Korean Car Parts
- British Car Parts
- Chinese Car Parts
- Sports/Exotic Car Parts
- Luxury Car Parts
- Performance Car Parts
- SUV/4x4 Spare Parts
- Truck Spare Parts
- EV Car Parts
- Hybrid Car Parts
- Auto Spare Parts in UAE
- Tesla
- Isuzu
- Ram
- Ferrari
- Bentley
- Lamborghini
- Genesis
- Maserati
- Lincoln
- Chrysler
- Opel
- Citroen
- SsangYong
- Seat
- McLaren
- Aston Martin
- Rolls Royce
- Maybach
- Alfa Romeo
- Bugatti
- Scion
- Abu Dhabi Car Parts
- Ajman Car Parts
- Al Khan Car Parts
- Al Sajaa Car Parts
- Deira Car Parts
- Dubai Car Parts
- Fujairah Car Parts
- Industrial Area 6 Car Parts
- Mussafah Car Parts
- Ras Al Khaimah Car Parts
- Sharjah Car Parts
- Umm Al Quwain Car Parts
- Acura
- BYD
- Chery
- Dacia
- DS
- Geely Emgrand
- EXEED
- GAC
- GAC Gonow
- Geely
- Gonow
- Great Wall
- Haima
- Haval
- Holden
- Iveco
- JAC
- Jaecoo
- Jetour
- Lotus
- Omoda
- Proton
- Renault Samsung
- Roewe
- Lucid
- Replacement Headlight
- Replacement Bumper