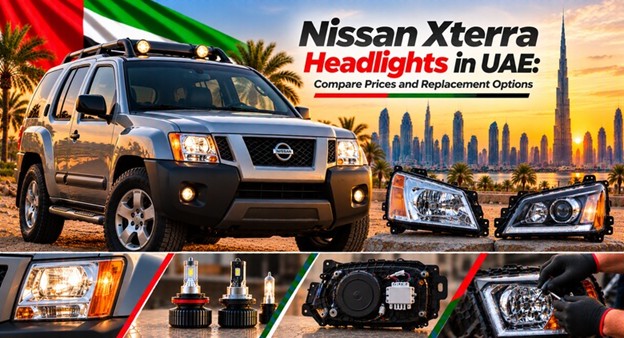
Nissan Xterra Headlights in UAE: Compare Prices and Replacement Options
October 24, 2026
A Nissan Xterra spends its life doing the sort of work that exposes weak parts quickly. School runs through Abu Dhabi traffic, long stretches of motorway, dusty weekends outside the city, perhaps the occasional rough track where branches and flying grit scrape across the front end. Then one morning, a headlight looks cloudy, the beam seems weaker than it used to, or the lens has picked up a crack. Annoying? Certainly. Expensive? It depends on what has actually failed.
When comparing Nissan Xterra headlights in UAE, Xterra owners should resist the temptation to buy the first lamp advertised for their model year. The vehicle's generation, facelift, market specification and headlight design all affect fitment. A used original may be perfectly sensible; a new replacement may be the better long-term choice. But neither is a bargain if it turns up with the wrong connectors or mounting points.
The trick is to identify the correct part before comparing prices. Get that right, and the rest becomes much easier.
Which Nissan Xterra Headlight Do You Actually Need?
Start with the vehicle, not the listing.
The Nissan Xterra was sold in different generations and configurations, and a headlight that fits one version may not fit another. Even within a broad model-year range, facelift changes can alter the lens shape, housing, brackets or connector arrangement. Imported vehicles can add another complication.
Before ordering, establish the model year, generation, original-market specification and whether you need the left or right side. If possible, photograph the identification label on the existing assembly. A VIN-based fitment check is useful, particularly when the vehicle has been imported or its history is unclear.
Don't rely on a seller's claim that a lamp fits “all Xterras”. That may be shorthand for a much narrower range than it sounds.
The Xterra's Two Generations Are Not a Minor Detail
The first-generation Xterra, sold from 2000 to 2004, and the second-generation model, sold from 2005 to 2015, use different headlight designs. They are not interchangeable. That is the first fitment trap to avoid.
There is another wrinkle. The early generation received a substantial front-end change for the 2002 model year, so a 2000–2001 lamp should not be treated as a direct substitute for the later 2002–2004 assembly. On some facelift models, the inner bezel finish also differs by trim.
For second-generation vehicles, the basic shape remained consistent across the model run, but trim-specific finishes can still matter. Check the assembly number and appearance before buying a single replacement, particularly if the other side is original and still in good condition.
New, Used or Aftermarket: The Price Is Only the Opening Bid
A cheap headlight is attractive until it arrives with a cracked mounting tab, the wrong internal finish or a connector that doesn't match. Then the bargain starts eating time.
| Replacement option | Main attraction | What can go wrong |
|---|---|---|
| New genuine Nissan | Original specification and traceability | Higher purchase price; stock may need to be ordered |
| Used original | Lower initial cost, often with factory design retained | Wear, hidden damage, faded lens or broken mounts |
| New aftermarket | May cost less than a genuine assembly | Fit, finish and beam performance vary by manufacturer |
| Reconditioned original | Can make use of a repairable existing assembly | Repair quality and remaining life depend on the work done |
| Repair of the existing lamp | Avoids replacing the complete assembly when the fault is limited | Not suitable for every crack, internal failure or damaged housing |
For an older Xterra used every day, a sound used original may be the sensible choice. If the vehicle is well kept and you plan to hold on to it for years, a new assembly may be worth the extra outlay.
Don't decide on price alone. Decide on condition, compatibility and how much risk you're prepared to carry.
What Do Nissan Xterra Headlights Cost?
Available overseas catalogue listings provide a useful benchmark, though they are not UAE quotations. For selected 2005–2015 Xterra applications, new genuine assemblies were listed at approximately US$107.55–US$134.29 per side for certain versions. Other trim-specific assemblies were listed at higher prices, around US$169.93–US$212.16.
Those differences are not necessarily evidence of overcharging. The listed assemblies vary by application and internal finish, and a listing for one trim cannot safely be compared with a different version just because both say “Xterra”.
| Price reference reviewed | Advertised amount | Important limitation |
|---|---|---|
| Selected genuine 2005–2015 assembly | US$107.55–US$134.29 | Overseas catalogue pricing, exact fitment required |
| Selected trim-specific assembly | US$169.93–US$212.16 | Different listed configurations; not a like-for-like comparison |
| Used original in the UAE | Current comparable price not verified | Condition and live availability need checking |
| Aftermarket assembly in the UAE | Current comparable price not verified | Confirm manufacturer and fitment |
| Installation and beam alignment | Workshop quotation required | Labour depends on access and condition |
A US-dollar price cannot be passed off as the UAE market price. Shipping, import charges, VAT where applicable, supplier margins and workshop labour all change the final bill. Ask for a delivered quotation in dirhams before comparing offers.
Why Two Listings for the Same Model Can Have Different Prices
Look closely at the part description and the difference often begins to make sense. One assembly may have a chrome-coloured inner bezel, another a darker finish; one may be new and supplied with a warranty, while another has been removed from a vehicle and sold without its original fittings.
Even the words headlight and headlight assembly can cause confusion. A complete assembly generally includes the lens, housing and reflector arrangement, but it may not include every bulb, bracket, cover or other fitting pictured in an advert. Never assume.
Before comparing two prices, put the details side by side: model years, trim compatibility, side, part number, condition, included parts and return terms. If those details do not match, the prices are not directly comparable.
The Hidden Cost of Buying the Wrong Headlight
The purchase price is visible. The cost of getting it wrong usually arrives later.
Imagine ordering a second-generation Xterra lamp because the seller has confirmed a broad 2005–2015 fitment range. It turns up, bolts into place, but its inner finish does not match the opposite side. Or a mounting tab has snapped during a previous removal, leaving the lamp loose and difficult to align. The part may be usable, but the saving has already become less convincing.
| Hidden cost | How it can affect the job |
|---|---|
| Incorrect generation | The assembly may not fit the vehicle at all |
| Wrong trim finish | The replacement can look visibly different from the opposite lamp |
| Broken mounting points | Repair or another assembly may be needed |
| Missing covers or fittings | Additional parts must be sourced |
| International delivery | Shipping can eat into the saving |
| Return freight | An incorrect order may be expensive to send back |
| Repeat labour | A failed or incompatible part may need removing and replacing |
Get fitment confirmed before paying. A written confirmation is particularly useful when buying a used lamp online.
Used Headlights: Inspect the Bits That Sellers Often Photograph Last
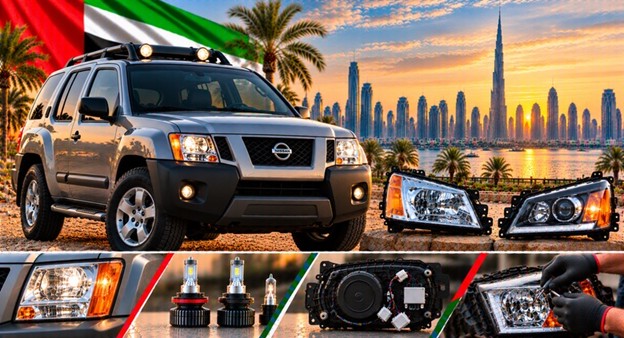
The front lens gets all the attention. The back of the assembly can tell you more.
Ask for photographs of every mounting point, the connector area, the rear housing and the part label. Look for cracks, broken tabs, repairs, corrosion and signs that someone has forced the unit out of a vehicle. A small amount of surface wear is normal on a used part; a damaged mounting point is a different matter.
Check the lens for yellowing, deep scratches and cracks. If the seller says the assembly has been tested, ask what was tested and whether the lighting functions were checked before removal.
The donor vehicle's mileage can be useful context, but it is not a reliable measure of headlight condition by itself. A low-mileage car parked outdoors for years may have a more deteriorated lens than a higher-mileage vehicle kept under cover.
Is a Reconditioned Nissan Xterra Headlight Worth Buying?
It can be, provided the repair addresses the actual fault.
A cloudy external lens may respond to professional restoration, while a damaged mounting tab may be repairable if the result remains secure and correctly aligned. Neither job requires replacing the entire assembly automatically.
But a cracked housing, extensive internal damage or a failed lighting system may call for a replacement instead. Polishing the outside will not fix electronics, and fresh sealant is not proof that a lamp has been properly repaired.
Ask the repairer to spell out what was done. Was the lens restored or replaced? Were the mounting points repaired? Was the housing resealed and checked for moisture? What does the warranty cover?
A reconditioned lamp should come with a clear description of its condition and repair history. Otherwise, the label is doing more work than the evidence.
Aftermarket Headlights: How to Judge Quality Without Guesswork
Aftermarket assemblies can be a practical option for an older Xterra, especially when a genuine part is expensive or difficult to obtain. The catch is that the aftermarket category covers products of varying quality.
Ask who made the lamp and whether it is designed for your exact model and trim. Confirm the connector layout, mounting points, lens finish and beam pattern. If you are replacing only one side, compare its appearance with the original lamp before ordering.
Do not assume that a lamp is good simply because the advert says “OEM quality”. That phrase does not identify the manufacturer or prove equivalence with the factory part.
If the supplier cannot provide a usable part reference, clear photographs or a written warranty, look elsewhere. A modest saving is not worth poor fitment or uncertain lighting performance.
When a Bulb Is the Problem, Not the Assembly
A failed bulb is generally a simpler repair than replacing the entire headlight assembly. Yet owners sometimes get quoted for a complete unit when the fault has not been properly isolated.
If one beam stops working, check the bulb and its connection first, where applicable to the fitted system. The fuse, socket or wiring may also be responsible. A bulb that fails repeatedly deserves further investigation rather than another replacement without explanation.
| Symptom | Possible cause | What to check |
|---|---|---|
| One beam has stopped working | Failed bulb, fuse, socket or wiring | Test the relevant circuit and bulb |
| Light flickers | Loose connector, damaged wiring or failing bulb | Inspect connections and reproduce the fault |
| Both headlights fail | Electrical supply or circuit issue, among other possibilities | Check the relevant fuses and electrical supply |
| Lamp is visibly cracked | Physical damage to lens or housing | Assess whether repair is safe or replacement is needed |
| Beam appears weak | Cloudy lens, ageing bulb, poor alignment or electrical fault | Inspect the lens, bulb and beam pattern |
Do not buy a complete assembly until the workshop has established what has failed. It is a basic check, but an important one.
Cloudy Lenses and Condensation in the UAE
An Xterra that spends long hours in the sun may develop lens haze as the external plastic ages. Dust and grime can make matters worse, and the resulting loss of clarity may become obvious during night driving.
External haze is not the same as moisture inside the housing. A light mist that clears after a temperature change can have a different explanation from persistent droplets, standing water or corrosion. The latter deserve a closer inspection of the casing, seals and ventilation.
Do not let a seller dismiss every moisture problem as normal. Equally, do not replace a perfectly serviceable assembly simply because a temporary mist has appeared once. Check whether it clears, inspect for cracks and establish whether water is entering the lamp.
The UAE climate makes condition important, but it does not diagnose the fault for you.
First-Generation Xterra: Check the Early Front-End Changes
For first-generation Xterras, the distinction between the 2000–2001 and 2002–2004 headlight designs is particularly important. The 2002 model year brought a major front-end change, including a different headlight appearance.
That means a lamp advertised for “2000–2004 Xterra” deserves closer scrutiny. It may cover only part of that range, or the seller may be using a broad description that overlooks the facelift.
Trim can matter too. Some 2002–2004 versions use different inner bezel finishes, so a replacement can fit yet still look wrong beside the existing lamp.
Before ordering, identify the year, trim and original part number. If you are replacing one side only, compare the finish with the lamp on the opposite side. A little checking now is easier than trying to explain the mismatch after fitting.
Second-Generation Xterra: Easier Sourcing, but Not Automatic Fitment
The second-generation Xterra ran from 2005 to 2015, giving owners a broader pool of potential replacement parts. The basic headlight shape remained consistent through the run, which can make sourcing easier than for the earlier generation.
Still, do not treat every assembly as identical. Trim-related finishes, replacement references and the condition of used stock can affect the choice. The seller should confirm the precise application rather than relying on a photograph of a similar vehicle.
For selected 2005–2015 versions, catalogue references include 26010-EA025 for a right-side assembly and 26060-EA025 for a left-side assembly, while other applications use references such as 26010-ZL00A and 26060-ZL00A. These are examples, not universal Xterra part numbers. Verify the reference against the vehicle and trim before buying.
Left or Right? Avoid the Most Basic Ordering Mistake
Confirm the side before you discuss price. The left and right headlight assemblies are separate parts, and the correct orientation should be established from the driver's seated position facing forwards.
Be careful with listings that use “driver side” and “passenger side” without stating the market they are describing. A vehicle imported from another market can make those labels confusing, so the safest approach is to confirm the actual left or right side and match the part number.
If the old lamp is still fitted, photograph its label and connector. If it has already been removed, keep it available for comparison. Ask the seller to confirm the replacement side in writing.
It is a small detail. It can prevent a surprisingly large delay.
GCC and Imported Vehicles: Verify the Original Specification
Not every Xterra in the UAE was originally supplied for the Gulf market. Some vehicles have been imported, and the original equipment may differ from that of a locally supplied model.
Depending on the vehicle, differences can affect lighting markings, beam pattern, connectors or other fitment details. Similar bodywork does not guarantee identical parts.
Give the supplier the VIN and, if known, the vehicle's original market. If that information is unavailable, use the existing assembly label and a physical comparison to establish what is fitted.
This is particularly important when buying used stock from abroad. A part may be listed correctly for a particular Xterra in its home market but still require careful verification before it is suitable for your vehicle in the UAE.
Installation Labour: What Should Be Included?
A straightforward bulb change is not the same job as replacing a complete assembly. The labour depends on access, the condition of the fasteners and brackets, and whether surrounding trim or other parts need attention.
Ask for the workshop's labour charge separately from the parts price. Confirm whether it includes removing the old lamp, fitting the replacement, checking the connectors and setting the beam correctly. If the old assembly has damaged brackets, establish whether repairing them will cost extra.
| Work item | What to confirm |
|---|---|
| Removal and refitting | Whether surrounding trim needs to come off |
| Bracket inspection | Whether damaged mounts are included in the estimate |
| Electrical check | Whether the original fault will be investigated |
| Beam alignment | Whether adjustment is included |
| Final operation test | Whether dipped beam, main beam and indicators are checked |
Do not assume that the lowest labour quote covers every step. Ask what is included and what could add to the bill.
Repair or Replace the Existing Headlight?
A complete replacement is not always necessary. The right answer depends on the damage and whether a repair can restore safe, reliable operation.
| Problem | Repair may be sensible when | Replacement may be preferable when |
|---|---|---|
| Cloudy outer lens | Professional restoration can recover clarity | The lens is cracked or badly degraded |
| Broken mounting tab | A secure, durable repair is possible | Several mounts are broken or alignment cannot be maintained |
| Failed bulb | The bulb is separately replaceable | The fault lies within a damaged assembly |
| Moisture ingress | The cause is identified and the housing can be restored | The casing or internal parts are extensively damaged |
| Loose electrical connection | The connector or wiring can be safely repaired | Internal damage makes the assembly unreliable |
Ask the workshop to explain why it recommends replacement. A clear diagnosis is more useful than a quotation with one expensive line and no explanation.
Do You Need to Replace Both Headlights?
Usually, not simply because one has failed. If the opposite lamp is sound, clear and correctly aligned, replacing the damaged side may be enough.
There are exceptions. The old lamp may have become yellowed or faded, making the new one look conspicuously different. Both sides may also have similar age-related deterioration, in which case a pair could be worth considering.
But buying two lamps without inspecting the second one can waste money. Ask the workshop to check its condition and beam output, then compare the cost of one replacement with the cost of a matching pair.
For an older Xterra, a good used original may be a practical choice. For a vehicle being restored or kept for the long term, a matching new pair may appeal more. The condition of the actual lamps should decide.
What About Headlight Brackets and Mounting Points?
A replacement lamp needs to sit securely. If a mounting tab has snapped or the bracket has been damaged, the headlight may not line up properly even when the assembly itself is correct.
Inspect the mounting points on the existing lamp before ordering. If the vehicle has been involved in a front-end impact, ask the workshop to check the surrounding mounting structure too. The lamp may not be the only damaged part.
Some brackets can be sourced separately for selected Xterra applications. That can be cheaper than replacing a complete assembly when the housing and optics remain in good condition, but the repair must restore secure mounting and proper alignment.
Do not accept a loose fit as “good enough”. A headlight that shifts or sits crookedly can compromise the beam and leave the front end looking poorly repaired.
Online Buying: What to Ask Before Paying
A good listing should identify the assembly, its condition and the models it is intended to fit. If it does not, ask questions before placing the order.
Send the supplier the VIN, model year, trim, side and original part number where available. Request photographs of the actual unit, including the label, connectors, lens and mounting tabs. For a used lamp, ask whether it has been tested and whether any repair work has been carried out.
Then confirm the final price, delivery time, warranty and return terms. If the part is coming from overseas, establish whether shipping and applicable import charges are included.
Do not assume a catalogue photograph represents the item that will arrive. The specific unit matters, particularly when buying second-hand.
Warranty and Returns: Read the Terms Before Installation
A headlight warranty is only useful if you understand what it covers. New genuine, aftermarket, used and reconditioned parts may have different conditions.
Ask whether the warranty covers electrical faults, moisture ingress or defects discovered after fitting. Confirm how long you have to report a problem, whether the part can be returned after installation, and who pays for shipping if it proves faulty or incompatible.
Keep the invoice and photographs of the delivered lamp. For a used assembly, record its condition before installation and retain the part number. If the workshop transfers any fittings from the old lamp, make sure that work is recorded too.
A seller's promise over the phone may be forgotten when a problem appears. Written terms leave much less room for disagreement.
UAE Summer and Dust: How to Look After the Replacement
A correctly fitted headlight still needs basic care. Keep the lens clean, use suitable cleaning products and avoid abrasive treatment that can damage its surface. If the vehicle spends long periods outdoors, inspect the lenses periodically for haze and signs of deterioration.
After dusty trips, clean the front end gently rather than scrubbing grit across the plastic. If you notice condensation, check whether it clears; persistent moisture should be investigated. And if the lamp has been replaced after an accident, keep an eye on the mounting points and panel alignment.
None of this guarantees a longer service life, but it helps you spot trouble early. Small defects are easier to assess before they turn into a failed lamp or a more involved repair.
Resale Value: Does a New Headlight Pay for Itself?
A working, well-aligned headlight helps an Xterra look cared for. A cracked lens, mismatched pair or loose assembly can make a prospective buyer wonder whether the vehicle has been repaired properly.
That does not mean the most expensive replacement is always the best financial decision. On an older Xterra, the extra cost of a new genuine lamp may not be reflected in the eventual sale price. A good used original, fitted properly and supported by an invoice, may be entirely reasonable.
Think about how long you intend to keep the vehicle, its overall condition and the cost difference between available options. Keep the paperwork either way. A documented repair is easier to explain than an undocumented part swap.
The Cost of Delaying a Headlight Repair
If a headlight has failed completely, flickers unpredictably or produces an unsafe beam, don't put the repair off. Poor night-time visibility is a safety issue, not merely a cosmetic annoyance.
A small external blemish is different from a cracked lens that lets water in. The latter can allow damage to spread, especially if moisture reaches reflective surfaces or electrical connections. That is not guaranteed to happen, but it is a risk worth addressing promptly.
If you are unsure whether the vehicle is safe to drive at night, have the lighting checked and avoid driving in conditions where the failed lamp compromises visibility. The cost of a timely inspection is easier to manage than a worsening fault or an avoidable safety problem.
Compare the Complete Installed Cost, Not Just the Part
A fair comparison includes the assembly, delivery, any missing fittings, labour and beam alignment. For an imported part, add the applicable shipping and import costs before deciding whether it really is cheaper.
| Cost element | What to ask |
|---|---|
| Headlight assembly | Is it new, used, reconditioned or aftermarket? |
| Delivery | Is the part already in the UAE? |
| Additional fittings | Are brackets, covers and other required items included? |
| Installation | What is the labour charge? |
| Beam alignment | Included or charged separately? |
| Warranty | Does it cover defects after fitting? |
| Returns | What happens if the part does not fit? |
Ask two or three suppliers to quote against the same part number and condition. That makes the comparison meaningful and helps expose missing costs before you commit.
A Simple Buyer’s Decision Matrix
Not every Xterra needs the same solution. Use the vehicle's condition and your budget to narrow the choices.
| Your situation | Option to investigate first | Why |
|---|---|---|
| Older Xterra used daily | Tested used original | Can keep costs down while retaining the original design |
| Well-kept vehicle intended for long-term ownership | New genuine assembly | Offers a clear route to the original specification |
| External lens haze only | Professional restoration assessment | Full replacement may not be necessary |
| Cracked housing or extensive internal damage | Replacement assembly | Repair may not restore reliable operation |
| Budget is tight | Used or aftermarket unit with clear warranty | May offer acceptable value if fitment and condition are verified |
| Early 2000–2004 Xterra | Generation and facelift-specific check | Avoids ordering an incompatible assembly |
| Imported vehicle with uncertain history | VIN and original part-number verification | Helps confirm market and trim compatibility |
Treat this as a starting point, not a substitute for inspecting the vehicle. A technician may find a simple electrical fault where a complete replacement was expected.
Before and After Installation: The Essential Checks
Before ordering
- Confirm the model year, generation and trim.
- Identify the correct left or right assembly.
- Check the existing part number and mounting arrangement.
- Confirm the inner bezel finish where it differs by trim.
- Request photographs of the actual part.
- Establish whether brackets, covers and other fittings are included.
- Confirm delivery, warranty and return terms.
- Get the complete installed price.
After fitting
- Test dipped beam and main beam.
- Check indicators and any integrated functions.
- Inspect the mounting points and panel alignment.
- Confirm the beam is aimed correctly.
- Check for loose connectors or warning signs.
- Look for persistent moisture after use.
- Keep the invoice and part details.
A headlight that lights up is not necessarily fitted correctly. Make sure the job is finished properly.
Finding the Right Replacement Through PartFinder UAE
When comparing available options, use PartFinder UAE as a reference point for organising the search around your actual Xterra rather than relying on the model name alone. The important details remain the generation, year, trim, side and part number.
Compare the condition of each assembly, its included fittings, delivery terms and warranty. If two listings show very different prices, establish whether they are genuinely equivalent before choosing the cheaper one.
For older Xterras in particular, the difference between a first-generation lamp, a facelift assembly and a second-generation unit is not something to gloss over. Confirm the fitment first, then compare the money.
UAE Update Reference: 13 October 2026
The price evidence reviewed for this article provides overseas catalogue benchmarks, but it does not establish a live, confirmed UAE retail price for every Nissan Xterra headlight. Local stock, used-part condition and delivery arrangements need to be confirmed directly before an order is placed.
Selected new genuine assemblies for 2005–2015 applications were advertised overseas at approximately US$107.55–US$134.29 per side for certain versions, while other listed configurations were around US$169.93–US$212.16. These are specific catalogue references, not a UAE delivered price. They also vary by trim and assembly specification.
| Evidence reviewed | Advertised price | Limitation |
|---|---|---|
| Selected genuine second-generation assembly | US$107.55–US$134.29 | Overseas listing; exact trim and fitment must be checked |
| Other selected trim-specific assembly | US$169.93–US$212.16 | Different listed configuration; not directly comparable |
| Used original in the UAE | No comparable live price verified | Condition, stock and warranty require confirmation |
| Aftermarket assembly in the UAE | No directly comparable price verified | Manufacturer and fitment need checking |
| Installation and alignment | Workshop quote required | Depends on access, condition and scope of work |
Before buying, reconfirm the part number, side, condition, stock status, delivery, applicable charges, warranty and return terms. Ask for the complete installed cost in dirhams. Without those details, a single headline price would suggest a level of certainty the available evidence does not support.
FAQs About Nissan Xterra Headlights in the UAE
Categories
- Audi
- BMW
- Car Accessories
- Car Tips
- Ford
- Land Rover
- Mazda
- Range Rover
- Top 10
- UAE Car Parts
- Used Car Parts
- Toyota
- Replacement Engines
- Nissan
- Hyundai
- Mitsubishi
- Volkswagen
- Honda
- Kia
- Chevrolet
- Dodge
- Jeep
- Subaru
- Renault
- Lexus
- Mercedes
- Suzuki
- Hummer
- Porsche
- Infiniti
- Peugeot
- GMC
- Mini
- Volvo
- Replacement Gearboxes
- MG
- Jaguar
- Skoda
- Cadillac
- Daihatsu
- Fiat
- German Car Parts
- Japanese Car Parts
- Aftermarket Car Parts
- Genuine Car Parts
- New Car Parts
- Reconditioned Car Parts
- European Car Parts
- American Car Parts
- Korean Car Parts
- British Car Parts
- Chinese Car Parts
- Sports/Exotic Car Parts
- Luxury Car Parts
- Performance Car Parts
- SUV/4x4 Spare Parts
- Truck Spare Parts
- EV Car Parts
- Hybrid Car Parts
- Auto Spare Parts in UAE
- Tesla
- Isuzu
- Ram
- Ferrari
- Bentley
- Lamborghini
- Genesis
- Maserati
- Lincoln
- Chrysler
- Opel
- Citroen
- SsangYong
- Seat
- McLaren
- Aston Martin
- Rolls Royce
- Maybach
- Alfa Romeo
- Bugatti
- Scion
- Abu Dhabi Car Parts
- Ajman Car Parts
- Al Khan Car Parts
- Al Sajaa Car Parts
- Deira Car Parts
- Dubai Car Parts
- Fujairah Car Parts
- Industrial Area 6 Car Parts
- Mussafah Car Parts
- Ras Al Khaimah Car Parts
- Sharjah Car Parts
- Umm Al Quwain Car Parts
- Acura
- BYD
- Chery
- Dacia
- DS
- Geely Emgrand
- EXEED
- GAC
- GAC Gonow
- Geely
- Gonow
- Great Wall
- Haima
- Haval
- Holden
- Iveco
- JAC
- Jaecoo
- Jetour
- Lotus
- Omoda
- Proton
- Renault Samsung
- Roewe
- Lucid
- Replacement Headlight
- Replacement Bumper