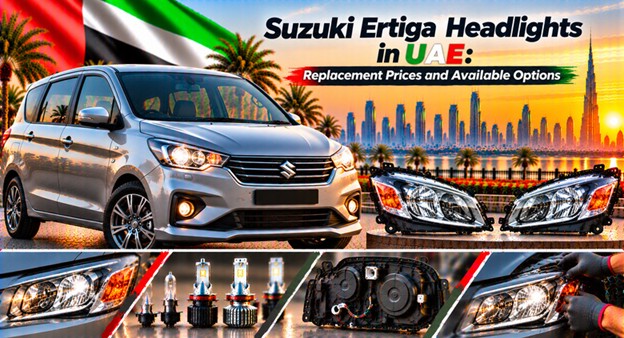
Suzuki Ertiga Headlights in UAE: Replacement Prices and Available Options
October 27, 2026
A Dim Headlight Is More Than an Annoyance on a UAE Road
It usually starts with something small. One headlight looks a little yellower than the other, the beam seems to stop short on an unlit road, or moisture appears behind the lens after the car has been washed. You put it off for a few days. Then you drive home after dark on a dusty stretch outside Dubai, and suddenly the problem feels rather less trivial.
The Suzuki Ertiga is a practical family MPV, bought for its space, everyday usability and ability to carry people without turning every journey into a logistical exercise. That makes dependable lighting especially important. School runs, airport pickups, late commutes between Sharjah and Dubai, weekend trips with a full cabin: the headlights do their work quietly until they stop doing it properly.
But don't rush into buying a complete headlamp assembly just because the light looks weak. A tired bulb, a cloudy lens, a poor electrical connection or a damaged reflector can produce similar symptoms, yet the repair costs are quite different. Start with the fault, not the shopping basket.
Which Suzuki Ertiga Headlight Do You Actually Need?
First, identify the generation and production year. Then check the exact vehicle specification. It sounds obvious, but a seller advertising “Suzuki Ertiga headlights in UAE” may be covering several different versions, and a photograph alone cannot establish that the part will fit your car.
The first-generation Ertiga and the newer body shape do not share every headlamp assembly. Even within one generation, a facelift, market specification or trim-level change can affect the shape, mounting points, bulb arrangement or electrical connections. A car originally sold in India, Indonesia or another market may also differ from a UAE-delivered vehicle.
Before paying, establish:
- The model year and, where possible, the production month.
- The VIN or chassis number.
- Whether you need the left-hand or right-hand headlight.
- The original lamp's part number.
- The bulb type and whether the assembly uses a halogen or another lighting arrangement.
- Whether the vehicle has its original headlights or previously fitted replacements.
There is a small but expensive trap here. The left and right sides are normally identified from the driver's seated position, looking forward, rather than from someone standing in front of the car. Confirm the seller's convention before ordering.
New, Used, Genuine OEM or Aftermarket?
These labels are often thrown around as if they mean the same thing. They don't.
A genuine Suzuki part is supplied through the manufacturer's genuine-parts system. An OEM-labelled part may refer to an original-equipment manufacturer, but the label alone does not prove that the item was made by the original supplier or meets the same specification. An aftermarket headlight is made by another manufacturer. A used original has already been fitted to another vehicle, while a reconditioned lamp has undergone some form of repair or refurbishment.
Each option has a place. A clean, undamaged used original can be a sensible purchase for an older Ertiga, particularly if the mounting tabs and adjusters remain intact. A new aftermarket unit may be more attractive when the original lens has shattered and the car needs to get back on the road quickly. Genuine replacement is worth considering when exact fit, finish and confidence in the specification matter more than the lowest upfront price.
What matters is what you are actually getting. Ask for the manufacturer, part number, condition, warranty and return terms in writing. “Original quality” is a sales description, not proof.
What Do Genuine Suzuki Ertiga Headlights Cost?
A precise UAE price cannot responsibly be quoted without matching the assembly to the vehicle. Public genuine-parts catalogues do identify Ertiga headlamp assemblies, but the listings available for this research do not establish a current, verified UAE retail price for every year and specification.
For reference, the Indian genuine-parts catalogue lists the right-hand headlamp assembly 35121M72R02 at ₹7,350 including Indian taxes, with fitment information covering selected 2022-onward Ertiga variants. This is an overseas catalogue price, not a UAE quote, and it should not be converted into a supposed local retail price without accounting for shipping, import costs, supplier margins and local availability.
The same catalogue identifies 35321M72R02 as a left-hand headlamp assembly for selected Ertiga applications, including certain 2018–2022 variants. That does not mean the part automatically fits every Ertiga sold in the UAE.
For a UAE purchase, request a VIN-matched quotation that separates the lamp price from fitting, any required bulbs, clips or brackets, and VAT where applicable. A single figure with no breakdown is difficult to compare fairly.
Aftermarket Headlights: A Cheaper Fix, but Check the Details
Aftermarket lamps can make financial sense, particularly when the Ertiga is several years old and a genuine assembly costs more than the owner expected. But the gap between a decent replacement and a poor one is not always obvious in a product photograph.
Look closely at the lens finish, housing moulding, mounting points, adjuster screws and rear covers. A lamp can bolt into place and still throw a badly shaped beam. Cheap plastic may also become cloudy or brittle sooner under prolonged sun exposure, while a poorly sealed housing can let moisture creep in after a wash or a spell of humid weather.
Don't assume every aftermarket headlight is inferior. Some are well made and offer a perfectly reasonable balance between price and function. The question is whether the specific product has reliable fitment information, consistent beam performance and a warranty that means something if the unit arrives damaged or begins fogging internally.
Ask the seller for the manufacturer's name and the exact reference number. If the answer is simply “fits all Ertiga models”, keep looking.
Is a Used Original Headlight Worth Buying?
It can be. A used original lamp may preserve the factory appearance and mounting geometry without the price of a new genuine assembly. For a vehicle that has accumulated years of family use, that can be a sensible compromise.
Yet a headlight can look immaculate from the front while hiding damage around the back. Inspect the mounting lugs, adjuster mechanisms, bulb sockets and rear sealing covers. Look for fine cracks, cloudy patches inside the lens, heat damage around the bulb opening and evidence that someone has opened the housing and resealed it carelessly.
A used lamp removed from a front-end accident deserves particular scrutiny. Even if the lens survived, the housing may have been twisted or the mounting tabs glued back together. Ask for photographs of the front, rear and every mounting point, not just a polished picture taken from a flattering angle.
And insist on a return window if possible. A used headlight that cannot be fitted, adjusted or sealed properly is not a bargain merely because its purchase price was low.
Compare the Total Cost, Not Just the Headlight Price
The cheapest listing does not always produce the cheapest repair. A replacement lamp might arrive without bulbs, covers or adjusters; an imported unit may incur delivery charges; and a workshop may quote fitting separately. Those costs add up.
The following figures are illustrative budgeting allowances, not verified UAE market quotations. Actual prices depend on the model year, supplier, condition and workshop.
| Replacement route | Part-cost position | Possible additional costs | Main concern |
|---|---|---|---|
| Genuine new assembly | Usually the premium option | Delivery, fitting, bulbs or clips | Higher initial outlay |
| New aftermarket assembly | Often lower than genuine | Fitting, missing fittings, returns | Quality varies by maker |
| Used original assembly | Can be economical | Cleaning, adjustment, replacement bulbs | Hidden damage or age |
| Repair or lens restoration | Potentially the lowest initial spend | Resealing, testing, later replacement | May not solve internal damage |
| Bulb or electrical repair | Usually cheaper if diagnosis confirms it | Diagnostic labour, wiring repairs | Won't fix a damaged reflector or housing |
A useful quotation should make the distinction between parts and labour clear. If one garage quotes a complete assembly and another quotes a bulb replacement, the totals are not comparable until both have diagnosed the same fault.
Why UAE Heat and Dust Can Take Their Toll
Park an Ertiga outdoors through a long UAE summer and the headlamp lens takes repeated punishment from heat, ultraviolet exposure and dust. Add frequent washing, fine road grit and temperature changes between the exterior and a cooled cabin, and the plastic surface can gradually lose its clarity.
The results vary. The outer lens may turn hazy, small surface marks can scatter light, or an ageing seal may allow moisture into the housing. Dust itself does not automatically mean the headlight needs replacing, and a little condensation under certain conditions is not always evidence of a failed seal. Persistent water droplets, pooling or moisture that refuses to clear are more concerning.
A headlight also suffers from ordinary wear. Bulb connectors can heat up, clips can break during previous repairs, and an old assembly may have been damaged by a minor knock that nobody thought worth reporting.
The useful question is not simply whether the lamp looks old. It is whether the lens, reflector, seals, mounting points and electrical connections can still do their jobs safely.
Is the Problem Really the Headlight Assembly?
Before ordering anything, check the basics. One weak beam may be caused by a failing bulb, corroded connector, poor earth connection or a damaged reflector. If both headlights have become noticeably dim, look beyond the assemblies themselves and check the electrical supply and condition of the lenses.
A sensible inspection begins with the lights switched off and the vehicle parked safely. The workshop can inspect the bulbs and connectors, check for voltage drop where appropriate, look for water ingress and test the beam pattern with suitable equipment. If a bulb has failed, replacing the entire assembly is unnecessary unless another fault justifies it.
There is also a difference between a light that appears dim and one that points too low. A poorly adjusted beam may leave the driver struggling to see down the road, even when the bulb and lens are in good condition. A beam set too high creates another problem by dazzling oncoming traffic.
Don't buy a headlight to solve an electrical fault. Diagnose first, then spend.
Can You Restore a Cloudy Ertiga Headlight?
Sometimes, yes. If the cloudiness is confined to the outer surface, a proper restoration process may improve clarity and light output without the expense of a complete assembly. The process generally involves controlled sanding where necessary, polishing and applying a suitable UV-resistant protective coating.
There are limits, though. If the reflector has deteriorated, the lens is cracked, the internal surfaces are cloudy or the housing has taken in water, polishing the outside will not fix the underlying fault. A temporary shine is not the same as a lasting repair.
Be wary of a quick wipe with an abrasive household product or an improvised chemical treatment. These methods may leave the lens looking clearer for a short while, but they can damage the surface or remove protection that helps it resist UV exposure.
After restoration, have the lights checked in darkness and, ideally, with a beam tester. If the output remains poor or the beam pattern is distorted, replacement may be the more sensible route.
Headlight Part Numbers: The Small Detail That Prevents a Big Mistake
Suzuki's genuine-parts catalogues identify different headlamp assemblies by their part numbers and vehicle applications. For selected newer Ertiga variants, the catalogue lists 35121M72R02 for the right-hand assembly and 35321M72R02 for the left-hand assembly. These are useful references, not universal numbers for every Ertiga.
Older Ertiga catalogues show other references, including 35121M60M10, 35121M60M20, 35321M60M10 and 35321M60M20 for particular applications. The catalogue associates them with specific headlamp assemblies and model configurations, so don't substitute one simply because the vehicle badge matches.
The safest approach is to compare the number printed or moulded on the original unit with the replacement supplier's fitment data, then confirm the match using the VIN or chassis details. Where the original lamp is broken beyond recognition, ask a Suzuki parts specialist to identify the correct assembly from the vehicle record.
One digit can matter. So can the side, the market specification and the mounting arrangement.
Genuine, OEM and “OEM Quality”: Read the Claim Carefully
Parts descriptions can be slippery. A seller may call a headlight “OEM quality” because it resembles the original, fits the same opening or comes from an established aftermarket manufacturer. That phrase does not, by itself, establish that Suzuki supplied the item or that it was made by the same factory as the original lamp.
A genuine part should have a traceable part number and a credible supply route. An aftermarket product should identify its maker and provide clear application details. If the seller claims that a replacement is made by the original equipment supplier, ask for evidence rather than relying on a sticker or a marketplace title.
This is not a call to buy genuine parts at any cost. A properly specified aftermarket assembly may suit an older Ertiga perfectly well. But the price difference should reflect an informed choice, not confusion over labels.
For owners who intend to keep the car for several more years, a well-supported part with a dependable warranty may be worth more than a nominally cheaper lamp from an anonymous source.
Beam Pattern Matters More Than a Bright-Looking Bulb
A headlight is not merely a bulb behind clear plastic. The reflector or optical system directs the light, while the lens and alignment help determine where the beam falls on the road. A replacement can appear brighter when viewed from outside and still perform poorly from the driver's seat.
Pay attention to the beam's shape, its cutoff where applicable, and whether the left and right sides work together. If the pattern is scattered, oncoming drivers may be dazzled while the Ertiga's driver gains little useful visibility. That is a bad trade.
The replacement must also suit the vehicle's intended lighting system. Avoid improvised bulb conversions that place a different light source into an optical unit designed for another type. More light is not automatically better light.
After installation, ask the workshop to align the headlamps and check both sides on suitable equipment. This final step is easy to overlook when the job is treated as a simple parts swap, yet it can make the difference between a repair that looks finished and one that actually works.
What Does Suzuki Ertiga Headlight Replacement Labour Cost in the UAE?
Labour depends on how the headlight is mounted, whether surrounding trim needs to come off and whether the workshop must repair damaged clips or wiring. A straightforward bulb change is a different job from removing a complete assembly, transferring fittings and checking the beam afterwards.
For budgeting, you might ask UAE workshops to quote separately for a basic bulb replacement, a complete headlamp assembly swap and a repair involving broken mounts or electrical faults. Treat any verbal estimate as provisional until the garage has seen the car.
| Job | What the quotation should cover |
|---|---|
| Bulb replacement | Correct bulb, access and installation |
| Complete headlight replacement | Removal, fitting and transfer of reusable fittings |
| Lens restoration | Preparation, polishing and suitable protective finish |
| Wiring or connector repair | Diagnosis, repair materials and electrical testing |
| Final alignment | Beam-pattern and aim checks |
These are descriptions of work, not fixed UAE tariff prices. I could not verify a dependable, current UAE labour rate specific to the Ertiga, so quoting an exact dirham figure would give a false impression of certainty.
Ask whether VAT is included, whether replacement clips are extra and whether the workshop will stand behind the seal if moisture appears after installation.
A Realistic Cost Comparison: Used Original or New Aftermarket?
Imagine an Ertiga owner in Sharjah with a cracked right-hand headlight. The car is used daily, the family needs it for school and work, and leaving it parked for a week while a part is shipped from overseas is hardly convenient.
The owner finds a used original assembly and a new aftermarket replacement. The used lamp costs less at first glance, but the seller cannot confirm its history. The aftermarket lamp costs more, yet comes with a written return policy and a stated fitment reference.
Which is the better buy? It depends on the evidence. If the used lamp has intact mounting points, a clear lens, a sound seal and a return option, it could be the sensible choice. If the seller cannot show the rear of the unit or explain where it came from, the lower price carries a risk that needs to be priced in.
The comparison should include the part, delivery, labour, any missing bulbs or covers, and the likely cost of putting right a poor fit. Don't assign invented prices to those items. Get both quotations on the same basis, then compare them.
Repair the Existing Headlight or Replace It?
Not every damaged headlight needs to go in the bin. A failed bulb, a replaceable cover, a loose connector or superficial lens oxidation may be repairable. A cracked housing, broken structural mounts, a damaged reflector or extensive water ingress can make replacement the more reliable option.
| Condition | Likely next step |
|---|---|
| One bulb has failed | Check and replace the bulb if the assembly is sound |
| Outer lens is cloudy | Assess professional restoration |
| Loose or corroded connector | Diagnose and repair the electrical connection |
| Broken mounting tab | Assess whether a secure, durable repair is possible |
| Cracked housing or persistent water ingress | Consider complete assembly replacement |
| Poor beam despite a suitable bulb | Check lens, reflector, electrical supply and alignment |
A repair should address the cause, not just hide the symptom. If water has entered the housing, for example, drying it out without dealing with the failed seal may buy only a little time.
Ask the workshop to explain why it recommends replacing the complete unit. A good technician should be able to point to the fault, show you the damaged area and explain why a smaller repair will or will not last.
What a Proper Installation Should Include
The new headlight should sit securely, line up with the bodywork and operate without flickering. It sounds basic, but poor fitting can leave uneven panel gaps, loose mounts or a seal that does not sit correctly.
Before the job starts, confirm whether the replacement includes bulbs, rear covers and adjusters. Some assemblies arrive ready for installation; others require reusable fittings to be transferred from the old unit. That distinction should be clear before the workshop begins.
During installation, the technician should inspect the mounting points and electrical connectors rather than forcing the lamp into place. Damaged clips may need replacement, and any disturbed seals or covers must be refitted correctly. If the bumper or surrounding trim has to be removed, ask that the fasteners be checked rather than hurriedly pushed back into place.
Once fitted, test the low beam, high beam, indicators and any position or daytime-running lights fitted to that particular version. Check for warning lights or intermittent operation, then inspect the beam aim and the fit around the lamp. Keep the invoice and part number for future reference.
How Long Does Headlight Replacement Take?
A straightforward replacement may be completed during a normal workshop visit if the correct part is already in stock and access is uncomplicated. The job can take longer if the bumper or trim must be removed, a mounting bracket is broken, wiring needs attention or the replacement does not match the original.
Waiting for the part is often the bigger delay. A locally available assembly can usually be fitted sooner than one that must be sourced from abroad, but stock claims should be confirmed before you arrange transport or take time off work.
When booking, ask the garage three things: is the part physically available, has fitment been checked against the VIN, and is the quoted time for installation alone or for the entire repair? That last distinction matters if you rely on the Ertiga for family travel or daily business use.
Do not drive away simply because the lamp has been bolted in. Allow time for testing and alignment, particularly if the original headlight was damaged in a collision.
Can You Replace an Ertiga Headlight Yourself?
A competent home mechanic may be able to replace a bulb or carry out a straightforward assembly swap, provided the correct service procedure and tools are available. But the difficulty depends on the year and specification, and some jobs require surrounding trim to be removed for proper access.
Start with the vehicle's handbook and the correct instructions for your version. Switch off the lights, park safely and allow hot bulbs and surrounding parts to cool. Never pull on wiring to disconnect a plug, and don't touch the glass of a halogen bulb with bare fingers if its design requires the glass to remain clean.
Complete assembly replacement calls for more care. A cracked mounting point, incorrectly fitted seal or poorly adjusted beam can leave you with a lamp that looks installed but is not secure or safe. If the job involves damaged wiring, water ingress or uncertainty about the beam alignment, use a qualified workshop.
DIY can save labour. It should not mean skipping the final checks.
Looking After Headlights in UAE Conditions
A little care can help keep the Ertiga's lights working well, although no cleaning routine will reverse internal damage or stop an old seal from failing.
Wash away accumulated dust with suitable automotive products and a clean cloth rather than rubbing a dry, gritty lens. Avoid harsh chemicals and aggressive household abrasives. If the lens has already been restored, check whether its protective coating needs maintenance according to the product manufacturer's instructions.
After a car wash, look for persistent condensation, water droplets or a visible pool inside the housing. Check that the rear covers are present and seated correctly, especially if the bulbs have recently been changed. A missing cover can leave the interior exposed to dirt and moisture.
Outdoor parking adds to UV exposure, so a shaded parking space helps where practical. And when a headlight begins to cloud over, deal with it before visibility deteriorates badly. Waiting until both lamps are weak can turn a manageable repair into an urgent one.
How to Judge Aftermarket Headlight Quality
A seller's photograph is only the beginning. Ask for the manufacturer, product reference and written compatibility details. Check whether the unit is new, used or refurbished, and whether it comes with the required bulbs, covers and adjustment hardware.
Look for clean moulding, even lens finish and undamaged mounting points. The rear of the assembly deserves as much attention as the front, since that is where you may find broken tabs, missing covers or signs of a previous repair. For online orders, request photographs of the actual item rather than relying solely on a generic product image.
Warranty language matters, too. Does it cover defects, water ingress or early failure? Does the seller require the item to be fitted by a workshop? Who pays return shipping if the part is incorrect? Get the answers before paying.
A reputable aftermarket assembly can be good value. But if the product has no traceable maker, no clear fitment reference and no meaningful return terms, the low price may simply be compensation for uncertainty.
Warranty, Returns and Imported Headlights
Imported parts can broaden the choice available to Ertiga owners, especially when an older or less common specification is difficult to find locally. They can also complicate returns. A lamp that arrives cracked, has the wrong connector or does not fit the car may cost more to send back than the buyer expected.
Before ordering, check the delivery estimate, packaging policy, warranty duration and return conditions. Confirm whether the seller accepts returns after the part has been test-fitted, and whether installation by a workshop is required to preserve the warranty.
For a local UAE purchase, ask for a tax invoice and a written description of the part supplied. For an imported order, keep the product listing, payment record, shipping details and all correspondence. If the item is advertised as genuine, request the packaging and part-number information that supports that claim.
A warranty is only useful if you understand what it covers. Wear, accidental damage, incorrect installation and water ingress may be treated differently by different sellers, so don't assume every failure will be covered.
Will a Replacement Headlight Affect Resale Value?
A properly fitted replacement headlight should not, by itself, be a major concern for a used-car buyer. What raises questions is poor workmanship, mismatched lamps, uneven panel gaps, water inside the housing or evidence that collision damage has been concealed.
If one headlight has been replaced after a minor parking incident, keep the invoice and explain what was done. A buyer may reasonably ask whether the surrounding bumper, wing or mounting brackets were also damaged. Clear records make that conversation easier.
Where practical, match the appearance and light output of the replacement to the opposite side. Two lamps with noticeably different clarity or colour can make an otherwise tidy Ertiga look neglected, and may prompt a buyer to investigate further.
Do not spend on a genuine headlight solely because you assume it will raise the resale price. The better objective is to restore proper function, safe alignment and a clean finish without paying for features or branding that make little difference to the vehicle's overall value.
Should You Upgrade the Ertiga to LED Headlights?
An LED bulb or conversion kit can look attractive in a product listing, especially if the promise is brighter, whiter light. But the lighting system must be considered as a whole. A bulb that physically fits the socket may not work correctly with the original reflector or projector, and a poorly matched conversion can scatter light into the eyes of other drivers.
Before changing the lighting type, establish what the vehicle was designed to use and whether the proposed replacement is suitable for that specific assembly. Check local requirements and seek advice from a qualified lighting specialist if you are unsure. Don't assume that a product advertised as “plug and play” is automatically appropriate for road use.
If the original headlight is simply worn out, replacing it with a correctly specified assembly and suitable bulbs may be the cleaner solution. If the problem is poor aim or a weak electrical connection, an LED upgrade will not necessarily address it.
The aim is usable light on the road, not the brightest-looking beam in a car park.
Common Mistakes When Buying Suzuki Ertiga Headlights
The same avoidable errors turn up again and again. Buyers choose by model name alone, confuse left and right, accept a vague “OEM quality” claim or forget to ask whether the bulbs and rear covers are included.
Other mistakes are less obvious. A used headlight may have been taken from a collision-damaged vehicle. A new aftermarket lamp may have the correct shape but the wrong connector. An overseas listing may quote an attractive price that excludes delivery, import charges and the cost of returning an incorrect part.
Before paying, pause long enough to verify the exact reference and condition. Ask for photographs of the mounting points and back of the housing, and compare the seller's return terms with the value of the part. If the supplier cannot answer basic questions, don't let urgency make the decision for you.
One more thing: never assume that a headlight from a different market will be identical just because the Ertiga badge and body shape match. Model-year and specification differences matter.
Suzuki Ertiga Headlight Buying Checklist
Use this checklist before confirming an order.
Before you buy
0 of 9 checked
Confirm the Ertiga's model year and VIN or chassis number
Identify the correct left-hand or right-hand assembly
Match the replacement part number to the original or VIN-based catalogue
Confirm the bulb type and lighting specification
Check the lens, housing, mounting tabs and adjusters
Establish whether bulbs, covers and fittings are included
Get the part price, delivery, labour and VAT details in writing
Check warranty coverage and the return policy
Arrange beam alignment and a functional test after fitting
Reset checklist
If several answers remain uncertain, hold off on payment. A few minutes spent checking fitment can save a return, a second workshop visit and another day without the car.
Questions to Ask the Workshop Before Approving the Job
A useful workshop conversation should leave you knowing what has failed, why replacement is necessary and what the finished repair includes. You do not need to know every technical detail, but you should be able to follow the reasoning.
Ask whether the technician has checked the bulb, connector, electrical supply and beam aim before recommending a complete assembly. If the lens is cloudy, find out whether the damage is external or internal. If the housing leaks, ask where the water is entering and whether the proposed repair addresses the cause.
Then turn to the quotation. Is the headlight genuine, aftermarket or used? Has the part number been checked against the VIN? Are fitting, bulbs, clips, alignment and VAT included? What happens if the lamp arrives damaged or develops persistent moisture after installation?
A professional workshop should answer without turning the conversation into a sales pitch. If you are shown a cracked mounting tab or damaged reflector, ask to see it. If the diagnosis is electrical, ask what test confirmed it.
You are paying for a working repair, not simply a new box fitted behind the bumper.
Finding the Right Suzuki Ertiga Headlight in the UAE
Owners in Dubai, Sharjah, Abu Dhabi and the other emirates can start with a Suzuki genuine-parts enquiry or an established independent parts supplier. Suzuki UAE provides a genuine-parts enquiry route and asks customers to supply vehicle details, including the VIN, to help identify the appropriate part. Availability and price still need to be confirmed for the individual vehicle.
Independent UAE suppliers may also be able to source Ertiga parts. One Dubai-based supplier lists Suzuki Ertiga spare parts and advises customers to provide a VIN for matching, although its public page does not establish a specific headlight price or confirm that every assembly is in stock.
When comparing quotes, give each supplier the same information and ask for the same specification. If you are sourcing through PartFinder UAE, use the vehicle details and original part reference to narrow the search rather than relying on the model name alone.
For older vehicles, ask whether the supplier can provide a used original as well as a new replacement. You may find that one option is available locally while another has to be ordered. Get the delivery date confirmed before planning the repair.
UAE Price Reference Update: 14 October 2026
The available research confirms genuine Ertiga headlamp references and an overseas catalogue price, but it does not establish a current, verified UAE retail price for a complete replacement headlight. It would be misleading to present an overseas figure as though it were the amount a driver will pay in Dubai or Abu Dhabi.
| Price reference | Published information | How to use it |
|---|---|---|
| Genuine right-hand assembly, selected newer Ertiga variants | ₹7,350 including Indian taxes for reference 35121M72R02 | Overseas catalogue benchmark only, not a UAE quotation. \ |
| Genuine left-hand assembly, selected Ertiga variants | Reference 35321M72R02 is listed for specified applications | Confirm exact fitment and request a UAE price. |
| Earlier Ertiga headlamp catalogue | References include 35121M60M10/M20 and 35321M60M10/M20 for listed configurations | Do not assume these fit later vehicles. |
| UAE genuine-parts enquiry | Suzuki UAE provides a route to request a quotation | Ask for VIN-matched pricing and current availability. |
For a useful comparison, obtain two or three written quotes for the same side and specification. Ask each supplier to separate the headlight price, delivery, fitting, extra fittings and applicable VAT. That gives you a genuine comparison rather than a collection of headline prices that may describe different parts.
Frequently Asked Questions
Categories
- Audi
- BMW
- Car Accessories
- Car Tips
- Ford
- Land Rover
- Mazda
- Range Rover
- Top 10
- UAE Car Parts
- Used Car Parts
- Toyota
- Replacement Engines
- Nissan
- Hyundai
- Mitsubishi
- Volkswagen
- Honda
- Kia
- Chevrolet
- Dodge
- Jeep
- Subaru
- Renault
- Lexus
- Mercedes
- Suzuki
- Hummer
- Porsche
- Infiniti
- Peugeot
- GMC
- Mini
- Volvo
- Replacement Gearboxes
- MG
- Jaguar
- Skoda
- Cadillac
- Daihatsu
- Fiat
- German Car Parts
- Japanese Car Parts
- Aftermarket Car Parts
- Genuine Car Parts
- New Car Parts
- Reconditioned Car Parts
- European Car Parts
- American Car Parts
- Korean Car Parts
- British Car Parts
- Chinese Car Parts
- Sports/Exotic Car Parts
- Luxury Car Parts
- Performance Car Parts
- SUV/4x4 Spare Parts
- Truck Spare Parts
- EV Car Parts
- Hybrid Car Parts
- Auto Spare Parts in UAE
- Tesla
- Isuzu
- Ram
- Ferrari
- Bentley
- Lamborghini
- Genesis
- Maserati
- Lincoln
- Chrysler
- Opel
- Citroen
- SsangYong
- Seat
- McLaren
- Aston Martin
- Rolls Royce
- Maybach
- Alfa Romeo
- Bugatti
- Scion
- Abu Dhabi Car Parts
- Ajman Car Parts
- Al Khan Car Parts
- Al Sajaa Car Parts
- Deira Car Parts
- Dubai Car Parts
- Fujairah Car Parts
- Industrial Area 6 Car Parts
- Mussafah Car Parts
- Ras Al Khaimah Car Parts
- Sharjah Car Parts
- Umm Al Quwain Car Parts
- Acura
- BYD
- Chery
- Dacia
- DS
- Geely Emgrand
- EXEED
- GAC
- GAC Gonow
- Geely
- Gonow
- Great Wall
- Haima
- Haval
- Holden
- Iveco
- JAC
- Jaecoo
- Jetour
- Lotus
- Omoda
- Proton
- Renault Samsung
- Roewe
- Lucid
- Replacement Headlight
- Replacement Bumper